티스토리 뷰
저의 맥북 초기 설정을 위한 방법을 기록합니다.
setup에는 크게 네 가지입니다.
- Mac Preference 설정
- 필요한 설치 파일들 설치(Brewfile)
- Oh my zsh 설정
- python 설정
- git/github 설정
Mac Preferences
- 탭 하여 클릭
$ defaults write com.apple.driver.AppleBluetoothMultitouch.trackpad Clicking -bool true
$ defaults write NSGlobalDomain com.apple.mouse.tapBehavior -int 1- 세 손가락 드래그
$ defaults write com.apple.driver.AppleBluetoothMultitouch.trackpad TrackpadThreeFingerDrag -bool true
$ defaults write com.apple.AppleMultitouchTrackpad TrackpadThreeFingerDrag -bool true- Dock 자동 감춤
$ defaults write com.apple.dock autohide -bool true- 배터리 퍼센트 표시
$ defaults write com.apple.menuextra.battery ShowPercent -string "YES"- 파인더 상태, 경로 막대 show
# Finder: show all filename extensions
$ defaults write NSGlobalDomain AppleShowAllExtensions -bool true

# Finder: show status bar
$ defaults write com.apple.finder ShowStatusBar -bool true

# Finder: show path bar
$ defaults write com.apple.finder ShowPathbar -bool true- 스크롤 항상 보이기
# Always show scrollbars
$ defaults write NSGlobalDomain AppleShowScrollBars -string "Always"- 바탕화면 격자 사용
# Increase grid spacing for icons on the desktop and in other icon views
$ /usr/libexec/PlistBuddy -c "Set :DesktopViewSettings:IconViewSettings:gridSpacing 100" ~/Library/Preferences/com.apple.finder.plist
$ /usr/libexec/PlistBuddy -c "Set :FK_StandardViewSettings:IconViewSettings:gridSpacing 100" ~/Library/Preferences/com.apple.finder.plist
$ /usr/libexec/PlistBuddy -c "Set :StandardViewSettings:IconViewSettings:gridSpacing 100" ~/Library/Preferences/com.apple.finder.plist- 키보드 커서 속도
$ defaults write NSGlobalDomain KeyRepeat -int 1
$ defaults write NSGlobalDomain InitialKeyRepeat -int 10
설치 파일
최대한 mac의 모든 설치는 homebrew를 통해 설치하고 있습니다.
brew를 통해 설치된 프로그램들은 brewfile로 관리가 되기 때문에 새로운 맥북 세팅 시 손쉽게 설치가 가능합니다.
Brewfile
bundle을 통해 현재 brew로 설치된 파일들을 추출할 수 있습니다.
$ brew bundle dump제가 사용하는 brewfile는 아래와 같습니다.
Shell Script
shell script를 통해 Brewfile을 설치합니다.
$ chmod +x ./mac_setting.sh // 실행 권한 추가$ ./mac_setting.shscript는 크게 세 부분으로 구성됩니다.
- DNS 설정
- Curl: (6) Could Not Resolve Host 에러 해결을 위한 설정입니다.
- Brewfile 설치
- zsh 설정
Oh my zsh
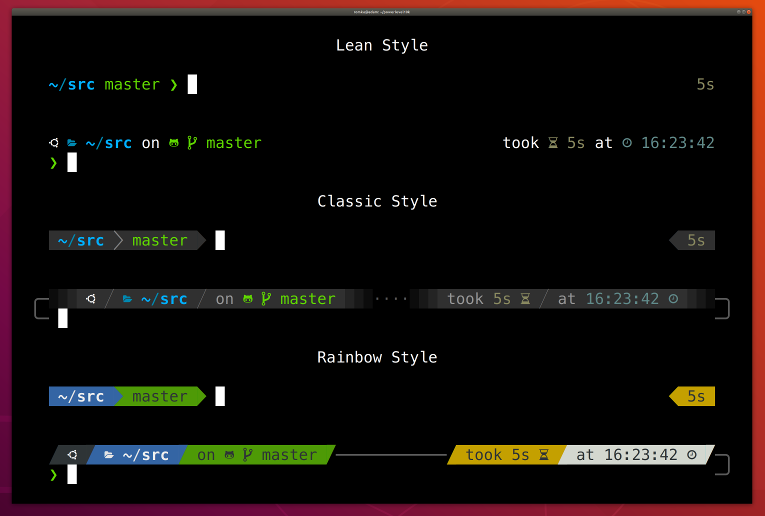
iterm2과 oh my zsh 그리고 powerlevel10k를 사용합니다.
mac_setting.sh이 무사히 실행이 되면 powerlevel10k 설정 화면이 나옵니다. 기호에 맞게 설정합니다.

iterm theme
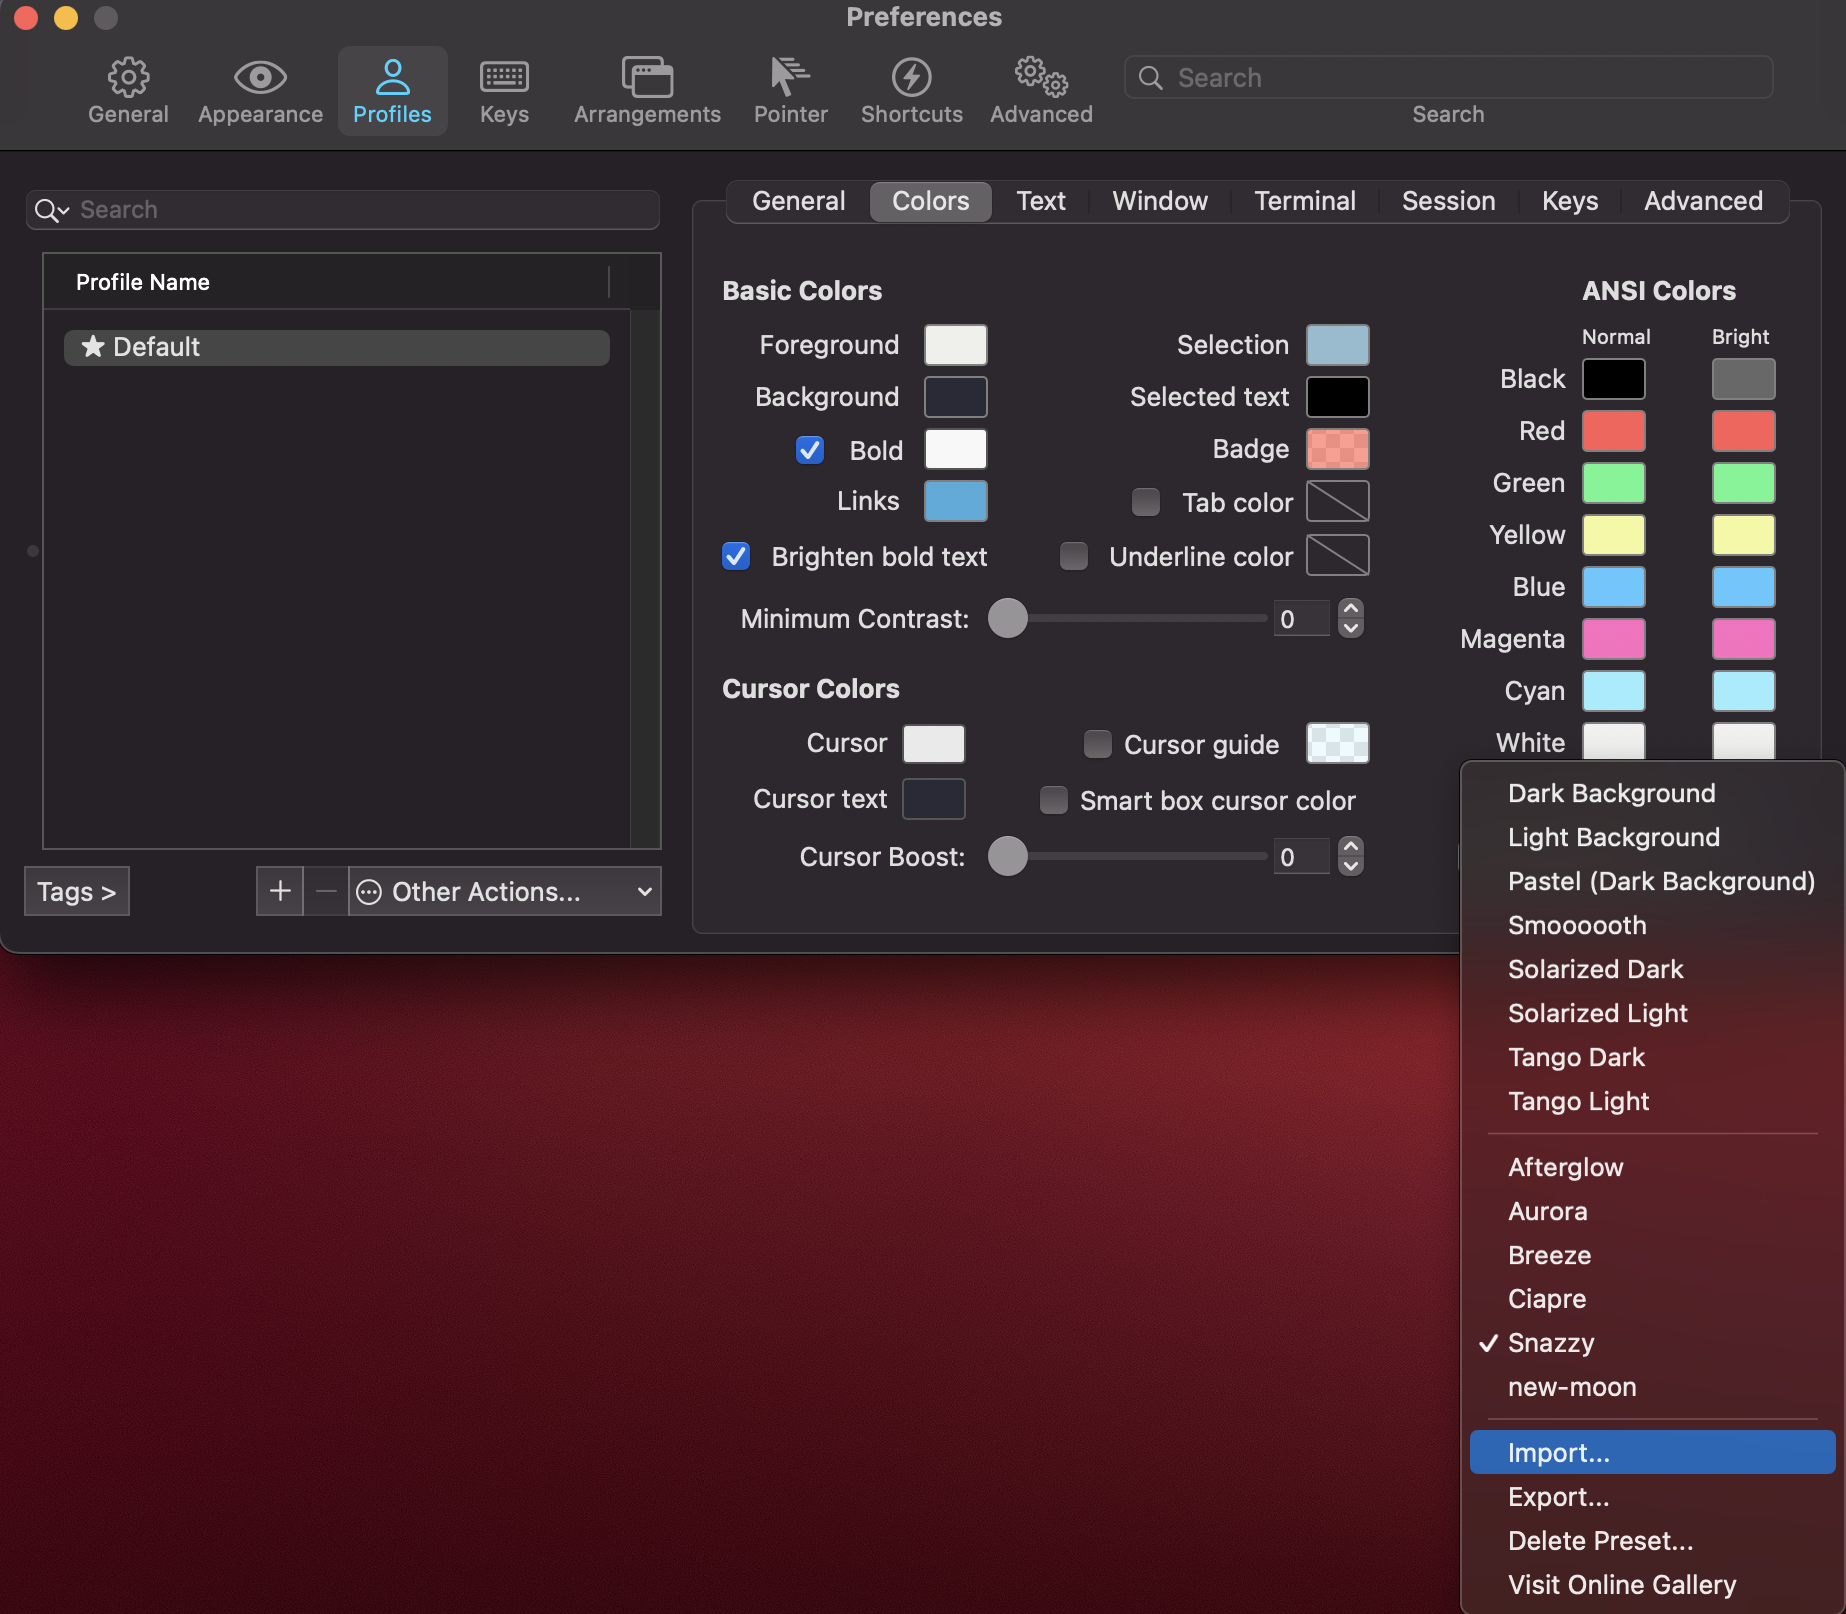
solarized dark를 많이 사용하는 것 같습니다. 저는 이번에 한번 snazzy를 적용해봤습니다.
방법은 아래와 같습니다.
- snazzy 테마 설치
$ wget https://raw.githubusercontent.com/sindresorhus/iterm2-snazzy/main/Snazzy.itermcolors- snazzy import & 테마 선택
Iterm2 > Preferences > Profiles > Colors
다운로드한 Snazzy.itermcolors를 import 하여 사용합니다.

적용된 모습은 아래와 같습니다.

Iterm
- 현재 위치와 같은 경로로 새 탭 열기: Preferences > General > Working Directory
- Title bar style: Preferences > Appearance > Theme: Minial
- 폰트 크기 14로 변경: Profiles > Text
- Margin 수정
- Appearance > Panes > Side margins: 5
- Appearance > Panes > Top & bottom margins: 3
- Unicode 설정: Profiles > Text > Unicode normalization form: NFC
Python
global python 설정
# 설치 가능한 python 확인
$ pyenv install --list
# 3.10.0 버전 인스톨
$ pyenv install 3.10.0
# 설치된 python 확인
$ pyenv versions
# 기본 python 3.10.0 버전으로 설정
$ pyenv global 3.10.0
Git/Github
git config 명령어로 이름과 메일을 설정하면 gitconfig에 입력이 된다.
$ git config --global user.name "ShinJam"$ git config --global user.email nevvjann@gmail.com$ cat ~/.gitconfig[user] name = ShinJam email = nevvjann@gmail.comdelta 설정
[core]
        pager = "delta --theme='Forest Night'"
        quotepath = off

[interactive]
        diffFilter = delta --color-only

[delta]
        features = side-by-side line-numbers decorations
        whitespace-error-style = 22 reverse

[delta "decorations"]
        commit-decoration-style = bold yellow box ul
        file-style = bold yellow ul
        file-decoration-style = none
git lfs 설정
[filter "lfs"]
        clean = git-lfs clean -- %f
        smudge = git-lfs smudge -- %f
        process = git-lfs filter-process
        required = true
ssh 설정은 아래 게시물을 참고해주세요.
[Tutorial] - Git/Github SSH 설정
GitKraken
bigsur에서 느려지는 현상이 발생한다. 해결방법은 아래와 같다.
$ codesign --remove-signature /Applications/GitKraken.app/Contents/Frameworks/GitKraken\ Helper\ \(Renderer\).appTodo
- dotfiles 관리
- 파일에 주석 정리
- git alias
Reference
dotfiles
- https://blog.appkr.dev/work-n-play/dotfiles/
- https://www.44bits.io/ko/post/managing-dotfiles-by-using-mackup
- https://github.com/webpro/dotfiles
- https://github.com/Falkor/dotfiles
Mac
- https://babypapa0412.tistory.com/entry/M1맥북에어-초기설정-10가지
- https://truesale.tistory.com/entry/맥북-꿀팁-맥북-구매-후-초기설정-기본-사용법
- https://github.com/mathiasbynens/dotfiles/blob/main/.macos
- https://gist.github.com/alanzeino/42b6d983c7aa2f29d64ea2749621f7cf
Brewfile
- https://velog.io/@iamchanii/Brewfile을-이용해서-팀-개발-환경-만들기
- https://taking.kr/blog/archives/6029.html
- https://blog.gangnamunni.com/post/brew_cask_mas/
pyenv
oh-my-zsh
git/github
Iterm
git-alis
(m1) zsh
반응형
'Tutorial' 카테고리의 다른 글
| brew install 특정 버전 (0) | 2022.01.03 |
|---|---|
| Git/Github SSH 설정 (0) | 2021.10.13 |
| 나도 Github 프로필 꾸미기 (0) | 2021.10.11 |
댓글
공지사항
최근에 올라온 글
최근에 달린 댓글
- Total
- Today
- Yesterday
링크
TAG
- gitignore
- 원티드
- Isolate level
- 위코드
- 덕타이핑
- user-agent
- 창업
- go
- direnv
- no-op
- inflearn
- buildkit
- 프리온보딩
- Complier
- docker-compose
- MSA
- cka
- HTTP/3
- Git
- Network
- k8s
- Python
- web_server
- database
- http
- pytest
- GitHub
- thetextbook
- QUIC
- HTTP/2
| 일 | 월 | 화 | 수 | 목 | 금 | 토 |
|---|---|---|---|---|---|---|
| 1 | 2 | 3 | 4 | 5 | 6 | |
| 7 | 8 | 9 | 10 | 11 | 12 | 13 |
| 14 | 15 | 16 | 17 | 18 | 19 | 20 |
| 21 | 22 | 23 | 24 | 25 | 26 | 27 |
| 28 | 29 | 30 | 31 |
글 보관함
