
티스토리 뷰
1. Profile repository 만들기
본인 github 계정 이름과 동일한 repository를 만들면 github profile 메인에 Readme가 보이게 된다.


2. Readme 수정
Profile에 보일 Readme를 기호에 맞게 수정해준다. generator을 사용해서 만들어 줄 수 있다.
다른 사람들의 Profile을 참고해서 구성해보면 좋습니다.
3. 꾸미기
Profile을 장식할 수 있는 방법으로 크게 네 가지 정도 됩니다.
- 이미지
- badge/icon
- Gist pinned
- 기타
3-1. 이미지
repository에 이미지를 올리고 Readme에서 불러주면 된다.
.
├── .github
│   └── workflows
├── README.md
└── images
    ├── aws.svg
    ├── css.svg
    └── sql.svg
<img width="100%" src="images/aws.svg">**capsule-render를 사용하여 꾸며줄 수도 있다.

3-2. Badge/Icon
3-2-1. Custom 배지
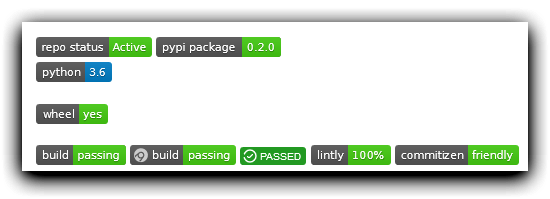
위의 사진처럼 custom 한 배지를 만들 수 있다.
- Badge: shields.io 사용; 참고
- Icon: simpleicons.org 사용
3-2-2. Profile view Counter 배지

3-2-3. 백준 배지

[](https://solved.ac/{solved계정)Gist Pinned
awesome-pinned-gists에 있는 다양한 프로젝트 중 productive-box와 github-stats-box를 적용했다.
Productive box: 커밋 시각 대시보드

- public gist를 생성해준다(https://gist.github.com/ )
- repo와 gist 권한을 갖는 깃허브 토큰을 만든다.
profile > settings > developer settings > Personal access token
- productive box를 fork 한다.
- fork 한 저장소의 Actions 탭에서 enable 버튼을 눌러준다
. github/workflows/schedule.yml의환경 변수를 수정해준다.- gist id를 복사한다. i.e. gist.github.com/shinjam/
a94a7fc865ae07a2be95a820aa38b1ae - GIST_ID의 값으로 복사한 gist id 값을 붙여 넣기 한다.
- TIMEZONE을 Asia/Seoul로 바꿔준다
- gist id를 복사한다. i.e. gist.github.com/shinjam/
- Fort 한 repo의 Secrets에 토큰을 추가한다
- Settings > Secets
- GH_TOKEN키를 갖는 2에서 만든 토큰 값
- Gist를 Pinned 한다.
Github-stats-box: github stats 대시보드

위에서 설명한 productive box랑 방법이 동일하다.
기타
블로그 최근 포스트: blog-post-workflow

1. workflow.yml 생성
. github/worflows/blog-post-workflow.yml
name: Latest blog post workflow
on:
  schedule: # Run workflow automatically
    - cron: '0 * * * *' # Runs every hour, on the hour
  workflow_dispatch: # Run workflow manually (without waiting for the cron to be called), through the Github Actions Workflow page directly

jobs:
  update-readme-with-blog:
    name: Update this repo's README with latest blog posts
    runs-on: ubuntu-latest
    steps:
      - name: Checkout
        uses: actions/checkout@v2
      - name: Pull in dev.to posts
        uses: gautamkrishnar/blog-post-workflow@master
        with:
          feed_list: "https://shinjam.tistory.com/rss"
feed_list: "블로그 rss 주소"를 입력해준다.
2: Readme.md 작성
Readme에 아래와 같이 넣어주기만 하면 최신 포스트들이 삽입이 된다.
<!-- BLOG-POST-LIST:START -->

<!-- BLOG-POST-LIST:END -->
Reference
반응형
'Tutorial' 카테고리의 다른 글
| brew install 특정 버전 (0) | 2022.01.03 |
|---|---|
| Mac Setup (0) | 2021.10.18 |
| Git/Github SSH 설정 (0) | 2021.10.13 |
댓글
공지사항
최근에 올라온 글
최근에 달린 댓글
- Total
- Today
- Yesterday
링크
TAG
- thetextbook
- k8s
- gitignore
- 원티드
- 프리온보딩
- docker-compose
- QUIC
- go
- direnv
- HTTP/3
- inflearn
- http
- buildkit
- GitHub
- user-agent
- Isolate level
- Complier
- Python
- cka
- 덕타이핑
- web_server
- no-op
- Network
- HTTP/2
- 위코드
- database
- pytest
- Git
- MSA
- 창업
| 일 | 월 | 화 | 수 | 목 | 금 | 토 |
|---|---|---|---|---|---|---|
| 1 | 2 | 3 | 4 | 5 | ||
| 6 | 7 | 8 | 9 | 10 | 11 | 12 |
| 13 | 14 | 15 | 16 | 17 | 18 | 19 |
| 20 | 21 | 22 | 23 | 24 | 25 | 26 |
| 27 | 28 | 29 | 30 |
글 보관함